Thursday, December 11, 2008

More Craftin' Fun

I have had so much fun over the last couple of days making things. I made a birthday/anniversary calendar and a gift card holder for my son's teachers. I personalized the front of the calendar with their initial using the JustRite Special Occassion set and also used the Fiskars threading water punch and bound each calendar with my BIA. I included a sample of the inside pages. I created/printed them on the computer and then used SU chalks for the borders and misc. stamps/ink to decorate according to season/holiday. I sprayed each page with hairspray so the chalk wouldn't rub off too much over time.
For the gift card holder, I used the idea found on this wonderful stamping blog: http://www.chicnscratch.typepad.com/ I love her blog and check it daily. She has the cutest ideas! I cut the circles on my Wishblade, put them together and decorated. The back has a 1/2 circle that holds the gift card.

Weekly Planner

This was very simple. I bought the weekly planner in the Michael's $1 bin and used the title page as a template to punch holes with the CAD then cut a slit in each hole so it would punch onto the spiral binding. I used some scrap paper, a leftover sticker, stickles (love me some stickles), and a stamp to add some color and to serve as a daily reminder for me spiritually. I like how it turned out and it took about 5 minutes.

Saturday, December 6, 2008

Tag Time

I went to an open house today at Amy's-The Croppin' Queen. She had a wonderful tag make'n'take and had some vendors. She went all out, everything was so organized! We made the tags you see below using the Creative Memories Tag Punch and a variety of other supplies. My fave is the one of my son. I had to laugh b/c it looks like he's wearing the bow! :) The CM tag punch is awesome! Thanks Amy for such a great time! Check out her blog, she's one of the craftiest people I know: http://collaborativecreations.blogspot.com/

Sunday, November 16, 2008

Cards for Newlyweds


I am safe to post this prior to the wedding because I doubt my niece checks this blog and with the wedding only a few days away she is undoubtedly too busy to even think of blurfing at this time.

I made 20 monogram cards with for the husband-and-bride-to-be. I love how they turned out! I have to send a shout-out to my cropping buddies b/c they helped me with the color selection and put up with my hissy-fit when my scallop punch decided to quit punching. Haha! I lost patience trying to make a box big enough for 20 cards and envies so I just used this bag. I've altered containers for her before so I figured she didn't need another container laying around. And, if she wants, she can save the cardfront I used on the front of the bag in her scrapbook and toss the bag. I decided on a design by searching the JustRite blog and SCS gallery for cards that I really liked and used some of those ideas until it turned into what I wanted.

Supplies: SU cardstock - Close to Cocoa CS and DP, Summer Sun, Pumpkin Pie. Misc. cream cardstock. Stamps - JustRite (love, love, LOVE!) border and Special Occassions font. Ink - Colorbox Chalk Ink in Burnt Sienna. Other - Cuttlebug Swiss Dots embossing folder (used with a pasta machine, worked like a charm!), Fiskars treading water punch, scalloped circle and circle punches. Misc. ribbon from Michaels. SU envies.

Sunday, November 9, 2008

Finally!

I finally had some much needed playtime. I have had a blast playing with my Wishblade today. I made this birthday card for my friend. I belong to a Wishblade yahoo group and this file was made by someone obviously very talented, I love it. As you can see, I used pink and brown cardstock and misc. "bling" (not sure of any brands). I really liked how this turned out so I may make a few more to keep on hand.

I also made these onesie cards. I've made one before, by hand, scroll down the blog to see it. Well, this time I decided to make a Wishblade file and see what happens. I worked on it all afternoon and am very excited about how it turned out. I am definitely making some more of these and stocking up for future baby showers. I used pink, blue and white cardstock, a baby stamp set, some eyelets (not sure of any brands) and SU Bashful Blue/Pretty in Pink ink and markers. I'm not fond of my faux stitching, it looks messy. It looked so good on other cards I've seen. Oh well, I'll keep practicing.

Wednesday, September 24, 2008

Crayon Roll

I've never heard of crayon rolls until recently-someone gave my son one as a gift and I thought it was so cute. So I did what every person in the world does-I "googled" it and came across the instructions on this blog (http://www.skiptomylou.org/2007/04/25/on-a-roll/). I made the felt one for a friend's daughter, she loves ladybugs. It's not perfect but I don't think it's too shabby for my first one. And I used a sewing machine, yay! I don't think I'll make another felt one as the shape had a tendency to morph throughout the stitching. I bought some cute jungle material to make my son a larger one that holds more crayons to use at home. I'll post it when it's done.


Thursday, September 11, 2008

How many days to "glow"?


A friend of mine is going through radiation therapy for breast cancer. Her husband told me I should come up with some kind of countdown so she wouldn't have to make big X's on the calendar. He said I'm crafty and made sure I didn't misunderstand it as "crappy", haha! He was kind of joking but I thought it was a great idea. I was going to see her today so I threw something together really quick late last night. She jokes and calls her radiation her time to "glow" so I ran with that pun. She has 38 treatments so I took 4 sheets of business cards and stamped them like a OSW with SU's Burst Into Bloom stamps and Gable Green/Pretty in Pink/Positively Pink/Lavendar Lace ink, Lavendar Lace marker. I also used a binder clip, misc. CS and misc. ribbon. On the back of the business cards, I printed some inspirational quotes I found online and added a few jokes, a card with her husband/sons/grandson's names on it, a half way there and you did it card. Some were serious, others were funny, like "You Glow Girl!" and little things to make her giggle. I know I could have done a million different things to make it bigger/better but I didn't have a ton of time and I think it turned out cute because of what was printed on each card.

Thursday, August 7, 2008

My Unmounted Stamp System

Okay, I am going to try to explain how I use SU stamps unmounted. I can't take credit for this system-I learned about it from someone at SCS. But, I've had people PM me with questions so I thought I'd take a few pics to explain it. The examples here use SU Happy Winter and Spring Solitude stamp sets. I purchased the Tack'N'Peel from Joanns.com and I already had a bunch of CD cases at home but you can purchase them most anywhere. The slimline cases do not work.


Storage in CD cases: Before I use the stickers, I make a photocopy of them and tape it to the front of the CD case. Then, I take the label and adhere it to the spine of the CD case so I can see it at a glance on the shelf (I adhere it to white paper first so I can see it clearly).


To keep the stamps in the case, I adhere as much vinyl cling as is needed to hold all of the stamps in the set, the sticker adheres to the vinyl cling (I used to use vinyl cling on my blocks to stamp with but it wasn't as sturdy as using Tack'N'Peel).


Step 1: Trim the stamp. I try to trim it in a way that gives me a hint as to where a certain place is in the stamp. For example, the t, k and y on this stamp stands out when trimmed.


Step 2: Adhere the sticker to the stamp. I stick the design sticker on attempting to line it up using the t, k and y as guides.
Step 3: Trim the sticker. I've tried to adhere the sticker and trim that and the stamp at once but my alignment is not very good (it wasn't when I used wood blocks either).

Step 4: Stick on block and stamp away! I've tried adhering the stamp to the block several different ways but my favorite is to use Tack'N'Peel on the blocks. That's all I use now. That stuff is great!


I used to adhere the sticker to white paper first then stick it on the stamp but my placement was always off. I got lucky a few times but not enough to continue doing it that way. Here's an example of what that looks like:


Although the design stands out against the white, I can see it just fine against the grey foam and it's one less step and less hassle.


Here's a side view of the block with Tack'N'Peel and the stamp:


Well that's it, I hope this makes sense. I love using this UM system. It works great for me. If you're interested in it, try one stamp set and see how you like it.
P.S. If I buy stamps that are already wood mounted, I pop them in the microwave for a few seconds to pull the stamp off of the wood block. Then, I make my own "sticker" by stamping the image on vinyl cling using StazOn ink. I do have some where the foam came off of the rubber and those work just fine by sticking the rubber image (without the foam) on the Tack'N'Peel.

Treat Box


I made this for a friend for her birthday. I love finding reasons to use my JustRite Stamper. When I first put the T and Tricia's Treats on there, there was too much space between the letter T and the rest of the words so I took a chance and trimmed off some of the rubber around the T so the words would fit more snuggly. It worked like a charm! The 2nd picture is the bottom flap of the card, opened. I wanted to make it a little different from a typical card shape but also wanted enough room to write a note. I used: misc. PP from Michael's (scraps from another project, the colors worked great for this project), SU Bashful Blue paper, blue Sterilite box, JustRite Stamper, Chocolate Chip ink, SU Curvy Verses, flower from SU Seeing Spots, stickles, and scallop punches.

Saturday, July 19, 2008

Photocopying Scrapbooks

At the crop last night, we discussed the cost of photocopying our 12x12 scrapbooks (among "other things", haha!). I googled this and found an interesting article. Check it out: http://en.allexperts.com/q/Scrapbooking-2602/2008/6/12X12-copies.htm

The article led me to this website, the prints are very cheap as compared to $10/page at Kinko's. I may have to order a print to check out the quality: http://www.scrapbooksplease.com/

Monday, July 14, 2008

Time Well Spent

I made this card for my friend, Jennifer (took me a while to upload). The sentiment read "Time spent with friends is time well spent" from SU's Time Well Spent set (as well as the flower here on the front). I used chocolate cs, cream cs, Making Memories pp, Cuttlebug A2 flower embossing folder (with my pasta machine, hehe), chocolate chip ink, Twinkling H2O's and misc. ribbon. I sanded the embossed image so it would show up better. I really like the way it looks. I'm not sure I'm happy with the card overall, it's not bad but it's not my fave. I'm still trying to get the hang of my Twinklers.

Wednesday, June 18, 2008

Lil' Rebel

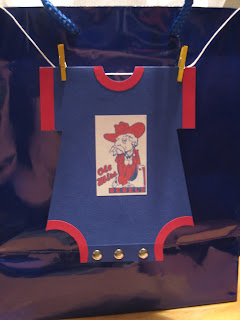
I made this for a friend's ds and dil. They are expecting a baby boy in August and they are huge Ole Miss fans. The baby's room is in an Ole Miss football theme,...can't wait to see the pics of that! How cute! I made this onesie card using this tutorial: http://laurenm.blogs.splitcoaststampers.com/2008/02/05/create-your-own-onesie-card-tutorial-and-important-note-please-read/
I "hung" it on the bag as if it were on a clothes line, not sure why it just seemed like a good idea at the time. The card was really easy, I couldn't believe it.


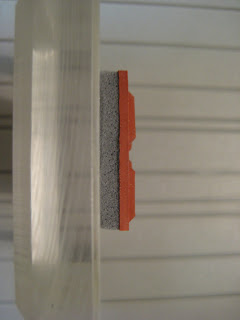
I also made the new mommy a coupon holder for baby coupons since she'll receive a ton. I guess I came up with this idea on my own. I thought of how grocery store coupon organizers work and went from there. I'm one of those people who believes that no idea is new...but I haven't seen one like it that I know of (please correct me if I'm wrong). I used the Bind-It-All to bind it. To be honest, I just look for things to bind, hehe!

There are 6 pockets: diapers/wipes, formula, food, medicines and creams, bath/body and misc.
And yes, that's my Scor-Pal in the background. I almost love it as much as my JustRite Stamper! :)

Thanks for looking!

Saturday, June 14, 2008

Another Version of 1st Card


The more I looked at the first card I posted, the more I didn't like it...there was just something missing. So, I disassembled it and tried again. This is what I came up with. I love the Swiss Dots embossed background. I bought the Cuttlebug embossing folder and ran it through a pasta machine. Yes, you read that correctly, a pasta machine. Worked like a charm! :)

Thursday, June 5, 2008

Bunco Gifts

It's my month to host bunco and since we aren't actually playing bunco (we're going out to dinner) I thought I'd make a little something for everyone (we usually do prizes based on bunco scores). I found these little memo pads with pens at Michael's. They had fairies and stripes on them. I decided to cover them with this PP I found and fix them up a little bit. I used bashful blue cardstock, my pink Mary punch, SU's scallop punch, SU's seeing spots stamp set, ribbon from Michael's, stickles, and of course my favorite new toy...the Just Rite Monogram Stamper for the verse. For those of you who don't know, the binder clip is made into a memo/photo holder. You just slide the paper or photo between the "handles". The ribbon keeps it together to actually hold something. I used my big Xyron with permanent adhesive on everything. It doesn't want to stick on the metal binder clips though. Next time I do those, I'll use the tape runner. It seemed to work fine on my sample. I hope they enjoy their goodies!

Saturday, May 24, 2008

My New Toy


I went to Archiver's last night and bought a new toy, the JustRite Large Round DIY Monogram Stamper (http://www.justritestampers.com/). It is so much fun! I made this card using: the JustRite small text that you purchase separately, SU "Seeing Spots", Marvy scallop punch (pink), paper piercer, ribbon and cardstock. To get the red stars in between the "thank u", I used my needlenose tweezers by Making Memories to hold the little star from the JustRite small text set and inked it in Real Red (SU Stampin' Spot).


I read some tips online last night that really helped me with the JustRite stamper:
  • Stamp on a mousepad and use even pressure to get a crisp image.
  • When you use letters to make a border (like "Thank U"), stamp plenty of extras because it takes some time to place those tiny letters (especially after you drop them a million times like I did, hehe).

  • When using the little letters, snap them all into the border area of the stamp and then slide them around to space them as you like. This is easier than taking them out to place them again.
  • When using the self-inking stamp, stamp once and look before lifting. This way, if the image isn't as dark as you want it, just stamp again. (I came up with this tip on my own, hehe.)
I like how this card turned out. It's very simple to make but I think it looks nice. It reminds me of ladybugs and summer! :)


This was my first blog post ever. Thanks for looking!
Update: I realize now this card is a little too simple. I should have layered and maybe used eyelets for the ribbon. Oh well, live and learn!

Posted by Picasa