


Step 4: Stick on block and stamp away! I've tried adhering the stamp to the block several different ways but my favorite is to use Tack'N'Peel on the blocks. That's all I use now. That stuff is great!

I used to adhere the sticker to white paper first then stick it on the stamp but my placement was always off. I got lucky a few times but not enough to continue doing it that way. Here's an example of what that looks like:

Although the design stands out against the white, I can see it just fine against the grey foam and it's one less step and less hassle.
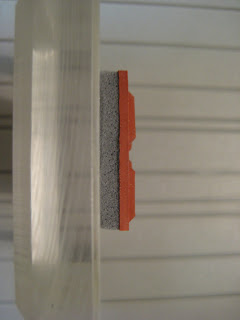
Here's a side view of the block with Tack'N'Peel and the stamp:

 I made this for a friend for her birthday. I love finding reasons to use my JustRite Stamper. When I first put the T and Tricia's Treats on there, there was too much space between the letter T and the rest of the words so I took a chance and trimmed off some of the rubber around the T so the words would fit more snuggly. It worked like a charm! The 2nd picture is the bottom flap of the card, opened. I wanted to make it a little different from a typical card shape but also wanted enough room to write a note. I used: misc. PP from Michael's (scraps from another project, the colors worked great for this project), SU Bashful Blue paper, blue Sterilite box, JustRite Stamper, Chocolate Chip ink, SU Curvy Verses, flower from SU Seeing Spots, stickles, and scallop punches.
 I made this card for my friend, Jennifer (took me a while to upload). The sentiment read "Time spent with friends is time well spent" from SU's Time Well Spent set (as well as the flower here on the front). I used chocolate cs, cream cs, Making Memories pp, Cuttlebug A2 flower embossing folder (with my pasta machine, hehe), chocolate chip ink, Twinkling H2O's and misc. ribbon. I sanded the embossed image so it would show up better. I really like the way it looks. I'm not sure I'm happy with the card overall, it's not bad but it's not my fave. I'm still trying to get the hang of my Twinklers.
 I made this for a friend's ds and dil. They are expecting a baby boy in August and they are huge Ole Miss fans. The baby's room is in an Ole Miss football theme,...can't wait to see the pics of that! How cute! I made this onesie card using this tutorial: http://laurenm.blogs.splitcoaststampers.com/2008/02/05/create-your-own-onesie-card-tutorial-and-important-note-please-read/
 There are 6 pockets: diapers/wipes, formula, food, medicines and creams, bath/body and misc.


